compost tumbler
The finished product from the Organic Compost Tumbler: sifted and unsifted compost.

April 7th, 2009
Organic Compost Tumbler

Chris from Organic Compost Tumbler sent me a UCT-9 compost tumbler to review.

April 3, 2009: The Results

About 2 1/2 months has passed since I loaded up the “World’s Best” Organic Compost Tumbler. At first the material in the tumbler was quite light and the tumbler was easy to turn. In the last couple of weeks, the material has become denser, reduced in mass to just the bottom half of the tumbler and so the tumbler has become more awkward to turn. I took these as signs that the compost was ready.

When I looked inside it looked very similar to my own open-pile compost. There were still some sticks in it but the oak leaves, kitchen scraps, and pine needles had broken down.
compost tumbler
In the case of compost tumblers, half empty is definitely half full.

I decided that the compost was ready. If I waited for the big sticks to break down that the other smaller stuff would rot away to almost nothing. Also, I needed compost for my vegetable garden and I needed the compost tumbler for all the trimmings from the spring garden cleanup.

My first question was how do I get the compost out? I wanted to dump it into a wheel barrow or bucket, not just on the ground but it’s impossible to put anything under the compost tumbler and turn the stuff out. I ended up dumping it on the ground but now I realized that if I’d found some plastic sheeting, that would have solved my problem.
compost tumbler
The compost filled the bottom half of the tumbler or two of these galvanized tubs…sorry that I don’t have a better way to measure the amount.

The compost apparently had not heated up as much as was expecting because avocado and mango pits had not broken down (and some were sprouting), nor did section of Turk’s cap stems (which I had cut into 3 to 4 inch pieces). However, there was no evidence of smaller seeds or garlic sprouting–which I have a problem with in my open pile. I do not interpret this as a fault of the Organic Compost Tumbler because (see below) successful composting depends a great deal on the mix of materials. Although I had chopped the larger pieces down and turned the tumbler almost every day, the mix was a bit on the brown side and initially too dry.

compost tumbler
A mix of fine compost and some larger chunks that I think need to break down more.

The result, then, was very similar to what I get out of my open compost pile–with one important exception. It wasn’t crawling with roaches, pill bugs, or earwigs. This made sifting it so much more pleasant. I use the fine compost on my vegetables when planting them or as top-dressing. I use the coarse compost as a mulch or throw it back on the pile as “starter” for the next batch.

Bottom Line

Do I like the Organic Compost Tumbler?
Yes. I don’t think the end product is much different than my open pile. But making the compost is a much more convenient. It’s so much easier to tumble the composter than it is to turn an open pile. And it looks nicer and it doesn’t attract pests (not only roaches, earwigs, and pillbugs but raccoons, rats, and opossums.)

Would I recommend it?
Yes. I think a compost tumbler is useful for people in urban or suburban neighborhoods who don’t have room or which there are restrictions on compost piles. It won’t produce all the compost you need nor will it be able to consume all the kitchen scraps and garden clippings that you produce. But it is a start.

Since receiving the Organic Compost Tumbler for review I’ve kept an eye out for other types. The prices are about the same but this is the sturdiest one I’ve seen. And it’s made out of recycled plastic.

Would I buy it myself?
I am considering buying one or two more…as budget permits. One is simply not enough to handle my composting needs. I used up the entire contents of my first batch in about two hours and wanted more. I have already filled the compost tumbler up: this time with chinaberry and hackberry tree sprouts. I’m looking forward to seeing whether a different mix will compost hotter and faster. I’ve learned my lesson about making sure it is damp (but not too wet). And I will probably “harvest” the mix as soon as the tumbler feels heavy and awkward to turn.

Read the rest of this entry »

bearded iris Strictly Ballroom
2009-04-05. Bearded iris ‘Strictly Ballroom’.

April 5th, 2009
Iris ‘Strictly Ballroom’

Today ‘Strictly Ballroom’ is the lone reminder of my former obsession with bearded irises.

Related

rose Ducher
March 21, 2009

March 30th, 2009
Rose ‘Ducher’

My roses rarely look like photos in rose books: you know, with hundreds of flowers cascading over a dense green bush. So my China rose, ‘Ducher’, is taking my breath away right now every time I catch a glimpse of it. I can’t quite capture the effect because the white flowers reflect the light in such a way that it looks like a bush covered in tissue paper flowers.

‘Ducher’ is said to be the only white China rose. (It’s pronounced “doo shay” according to the Aggie’s Earthkind Roses site. I’m glad they include that because I’m always in a muddle over French names.) They are ivory white, meaning they have a very slight yellow, rather than pink, tint. Depending on the light, some flowers seem to glow from within. The flowers are about 3 inches across and rather flat. They have a lemon-y scent. The petals fall rapidly when the flower is finished so there are never ugly brown flowers drooping on the plant as is sometimes a problem with white roses.

rose Ducher

The bush is very dense and twiggy and looks nice even when it’s not blooming. The leaves are a flat medium green. New growth is very red. The stems are almost thornless.

Garden History

This is my second ‘Ducher’ rose. I planted the first one on the south side of the yard. It only got winter sun and so bloomed well in winter. Several years ago it succumbed suddenly to cane dieback. When my neighbor built a wooden privacy fence on the north side of my yard, I was able to begin taking out the nandina hedge. I decided I wanted to replace the roses I’d lost in the 2006 drought. ‘Ducher’ was the first replacement–the only rose I’ve bought twice.

rose Ducher
Rose ‘Ducher’. March 28, 2008. Austin, TX

The new situation has suited it. I thought the first one was a nice little rose before. This one is like the snow queen. These two photos were taken almost exactly a year a part and it’s doubled in size in every direction. The Antique Rose Emporium says that ‘Ducher’ is smaller than most China roses and a good candidate for containers. With only my experience of my first ‘Ducher’ I would have agreed. This one’s now about 4 feet tall and 5 feed wide. You’d need a pretty large container.

rose Ducher
Rose ‘Ducher’. March 21, 2009 Austin, TX

This year ‘Ducher’ began blooming on February 6th and each week has become more and more laden with flowers. These last two weeks it’s upstaged everything else in the garden. I really love ‘Ducher’. Although the individual flowers are not as arresting as ‘Souvenir de la Malmaison’ the overall effect of the bush is very attractive. And it’s not at all fussy. It doesn’t need a lot of pruning and it seems resistant to most diseases and pests. Basically all I’ve had to do is plant it where it got enough sunlight and make sure it got enough water. In a year when most of my plants were simply surviving the drought, ‘Ducher’ has been thriving.

English peas

March 24th, 2009
Pisum sativum, English peas ‘Green Arrow’

Although some of you are just putting in your spring veggies (or are still snow bound), here in Austin I’ve already pulled out my cool weather plants like broccoli and English peas. I think the peas normally might have lasted longer but Austin had a week of days in the mid-80s and after that the peas stopped flowering and looked like they were at the end of their season. I needed the space for warm weather plants so out they came.

I planted the English peas as part of my new fall vegetable garden. After being inspired by the Austin Master Gardener’s tour last April, I decided to put in a raised bed for fall vegetables. Over the winter months this spot of the yard gets full sun; in the summer it is in heavy shade. It is also on the south side of the house, protected from cold winds from the north. I have floating row covers for frosty nights. Zanthan Gardens did not experience a hard freeze at all in winter 2008/2009.

English peas

This was my first experience growing English peas. I’ve grown sugar snap peas before but AJM turned up his nose at them. My Englishman wanted English peas. I bought Botanic Interests ‘Green Arrow’ peas from Central Market because they were at hand. Only after I planted them did I learn they were the same peas that Carol @ May Dreams Gardens favors.

Garden History

2009-09-06.
Plant one 4-foot row of peas.
2009-09-19.
The English peas are up. They started poking up last Sunday but today they have their true leaves. I should plant another row.
2008-09-27.
Plant two more 4-foot rows of peas.
2008-12-15.
I don’t have a record of the first flower, but I did include it for GBBD for December, 2008. They are in full flower when I take a photo of them for GBBD January 2009.
2009-01-02.
The English peas are finally blooming as if they meant it. Do they flower best after the solstice like sweet peas?
2009-01-27.
First harvest. Afraid it will freeze tonight so pick a ripe handful.
2009-02-10.
Finally harvest enough peas to serve for dinner.
2009-03-01.
Pick last of the English peas. Wiped out by three 80° days last week. Still, harvested more than I planted which is a plus. They were very yummy.

English peas

Taste

When I served AJM some peas he said, “Mmmm. You sneaked a little butter on them.” I hadn’t. I’d added only the tiniest pinch of salt. Shelled right after picking and put directly into boiling water, these peas were sweet (but not sugary sweet) and, yes, almost creamy.

Lessons Learned

Overall, I think I was only mildly successful growing English peas this first time. I’m definitely going to try them again next year. This is what I’ll do differently.

1. Plant more peas.
One packet of seed planted 15 feet of peas and that is not enough for the two of us (unless I figure out how to increase yields–‘Green Arrow’ is supposed to be very high-yielding). While they were bearing, I picked peas about every other day but usually I only had enough peas to throw into rice. Only a couple of times did I get enough for a small side dish.

2. Grow them up a net.
Although ‘Green Arrow’ is a dwarf variety, peas like to grow upward. I used twigs and sticks for stakes but this was inefficient. They flopped too much and it was hard to harvest them. I missed harvesting some peas in their prime and by the time I found them they were hard and starchy.

I also need to grow them in the north-most rows of my 48-square foot raised vegetable garden because they shade everything to the north of them.

3. Stagger plantings.
I’m still not sure when is the best time for planting peas in Austin. So next year I will stagger my plantings. If we’re still having 100 degree days in September, I don’t think I can plant them any earlier. But since they didn’t really begin flowering until after the winter solstice, I will try planting some later to see if I can extend the season into March and April.

Texas Organic Vegetable Gardening suggests planting peas 8-10 weeks before the first average frost date (which I did) and 4-6 weeks before the last average frost date. This was an unusually hot and dry winter for Austin: we had 9 days in the 80s between our average frost dates. Peas don’t seem to like temperatures in the 80s. The seed packet confirms this.

Peas will not be successful if they are not ready for harvest before temperatures rise into the upper 70s and low 80s.

Any other advice from anyone growing peas successfully in central Texas? I’m especially interested in knowing when you plant them.

MaxiCool garden gloves
Gloves for people who hate to wear gloves. (Like me!)

March 21st, 2009
Lightweight Gloves

Dear Mrs. Obama,

I’m so glad that you’ve taken spade in hand and started a vegetable garden in your new back yard. Whatever the reason–taste, economy, education, relaxation, health, exercise–a vegetable garden is a great thing to have. You’re setting a wonderful example for your daughters and the country. I hope that more people follow your lead and tear up a bit of lawn for some vegetables. That would be one way to raise our Gross Domestic Product. More produce. Wouldn’t it be great if we once again became a nation of producers instead of consumers?

But I digress. I’m really writing because after the initial burst of happiness and pride in seeing you and all those school children digging up the White House lawn, my second thought was, “Where are Mrs. O’s gloves?” (I wasn’t the only one.)

Now I hate to wear gloves and my hands show it. But you have important responsibilities hosting visiting dignitaries and the like and it wouldn’t do for your hands to look like mine, caked with black clay, the grubbiness embedded in my cuticles and under my fingernails. The dirt is as much a part of me as I am part of the dirt.

So may I suggest some gloves? I’ve found the perfect pair–perfect in that I can wear them and forget I have them on. I can dig around and pull out roots and rocks because I can actually feel them through the gloves. The touch is so delicate that I can transplant tiny larkspur and bluebonnets.

They are Cool Mud gloves by Little’s Good Gloves.

I don’t work for Little’s Good Gloves or PIP USA (who seem to be the manufacturer. No one sent me these gloves to review. I just walked into my locally-owned, independent nursery The Natural Gardener one day, tried them on and decided that they might do. I was so happy with them that I went back and bought a second pair after I wore out the first. For me, it’s these gloves or none at all and I’ve gardened too many years with no gloves at all.

These are, as the title indicates, lightweight gloves. I wore out the fingertips on my first pair clawing at rocks. They definitely are not made for that. They won’t protect your hands from nails in the ground or the pricks of rose thorns, agaves, or yuccas. But for all those more delicate garden chores when you might think “I won’t bother with gloves for this.” they are perfect. One of these days soon, my fingernails might be grub free. Then, I hope, you’ll let me shake your hand.

Sincerely,
M–

photo: raindrop on bluebonnet leaf
2009-03-15. Raindrop on Texas bluebonnet leaf.

March 19th, 2009
Week 11: 3/12 – 3/18

Dateline: 2022
A very dry year. Bluebonnets are starting to bloom but only because I’ve been hand watering them. After getting off to a late start redbuds and Mexican plums are in full bloom, making me think it’s February instead of March. The one real success story is the Texas mountain laurel. All up and down our street they are suddenly in full bloom. Even the new little ones in the lawn have flowers for the first time ever.

The red oak in the back leafed out ahead of the cedar elms. Then the cedar elm by the back fence.

Dateline: 2011
Daffodils give way to irises. Both the blue (lavender) and white cemetery irises are in full bloom. The ‘Ice Follies’ are finished but the ‘Trevithians’ are holding out.

Pink bluebonnets in full bloom. Some bluebonnets but overall this is a very poor year for them at Zanthan Gardens because of drought.

Dateline: 2009
It rained!

For the first time in 18 months Austin had a real rain; nearly 3 inches of rain spread over 5 cold and wintry days. From 3/4 to 3/10 the temperatures were in the 80s. Then on Wednesday (3/11), the front came in and settled. Temperatures dropped 40 degrees. On Thursday and Friday the thermometer barely moved from a low of 40 to a high of 45. On Friday (3/13), Austin’s high temperature was lower than Manchester, UK. Great for Austin. Disappointing for our visitor from the UK. The rain didn’t clear out until Sunday afternoon. I think that’s the longest stretch of cold we’ve had in the abominably hot winter of 2008/2009. And then, guess what. Right back up to the 80s Monday, Tuesday, and Wednesday. They were gorgeous days to be in the garden but that heat quickly dried out the soil and burn bans lifted one day were almost immediately reinstated. (Compare my glee about the rain and cold to my grumbling remarks in 1997 and 1998 below–ah, what a difference an 18-month drought makes!)

When I look at the photos for this week from previous years, it’s obvious that the drought has taken its toll. The Tulipa clusiana has not started blooming yet and there are no bluebonnets to provide a sheet of blue background for them in the meadow. The redbud pictured below died several years ago and the Texas mountain laurel had very few flowers this year–so the combination in that photo will not be repeated. There’s no sign of my usually dependable daffodil ‘Hawera’. The wisteria leafed out without flowering.

However, the white lantana is blooming wonderfully. The roses ‘Ducher’ and ‘Souvenir de la Malmaison’ are in glorious full bloom. (That observation needs a lot of exclamation marks because no photograph I’ve taken can do them justice.) The Meyer lemon has gone bonkers with flowers. The iris albicans and bridal wreath are also at their height this week. The sweet peas appreciate the cold and rainy weather. The cedar elm and red oak trees have all leafed out. After the rain, the leaves look so fresh and glossy and brilliantly green I spend all my time looking up at them. What comparatively few baby blue eyes there are have begun to bloom and fill out empty spaces. Same with the cilantro. Overall the meadow looks quite bleak. But the rain is nudging the most recalcitrant flowers into bloom.

Best rumor I heard this week: Austin’s La Nina weather pattern might almost be at an end. We are to expect a normal summer not the pits of Hell like last summer.

First flower: California poppy ‘Mikado’ (3/17); Engelmann daisy (3/17); Oenothera speciosa (3/17).

Dateline: 2006
photo: Tulipa Clusiana
2006-03-15: Tulipa clusiana and Texas bluebonnets.
Read the rest of this entry »

rose Souvenir de la Malmaison
2009-03-15. Rose ‘Souvenir de la Malmaison’ is in full bloom this year as she was in 2008. But in 2007, she didn’t start blooming until March 17th.

March 15th, 2009
GBBD 200903: Mar 2009

Carol at May Dreams Gardens invites us to tell her what’s blooming in our gardens on the 15th of each month.

March 15, 2009

I wrote a great deal about March (Zanthan Gardens most floriferous month) in my GBBD post for March 2008. Rather than repeat myself, I find it more interesting to look at the differences between this year and previous years. I began participating in GBBD in its second month, March 2007. So this is the third March, I have GBBD records for.

Austin is now in its 18th month of drought. The week before this GBBD, we had a week of temperatures in the 80s (15 degrees above normal–more like late May than mid-March). Then earlier this week (3/11), temperatures fell 40 degrees and stayed in the 40s for 5 days. And it rained–cumulatively about 3 inches of rain which is more than we’ve had in single storm system since 2007.

I’m encouraged by how many flowers are dependable in March despite Austin’s crazy extremes of weather, especially this time of year.

Lupinus texensis
2009-03-15. Bluebonnet, Lupinus texensis
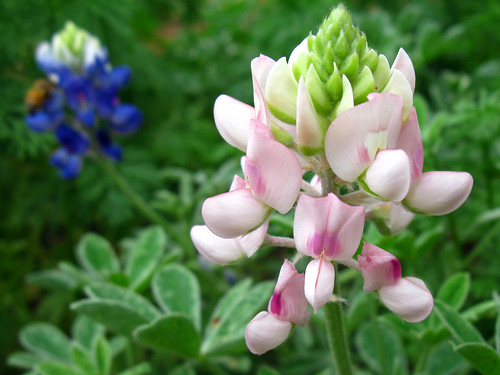
Some bluebonnets always manage to bloom. Austin has far fewer of our beloved state flower this year and the plants are much smaller. Some of the bluebonnets in my yard are but a single small stem right now. Pill bugs (or something) mow them down. And the stressed and weakened plants have been attacked by spider mites. But this year I’ve had some unusual variations: 2 pink bluebonnets and 3 white ones.

bridal wreath spiraea
2009-03-15. Bridal wreath spiraea
The bridal wreath spiraea struggled for a few years but finally seems to be making a comeback–probably because I started pruning, feeding, and watering it after I almost lost it. Some plants just demand attention.

Aloe barbadensis
2009-03-15. Aloe barbadensis

Aloe barbadensis
2009-03-15. Aloe barbadensis
This is the second year the aloe vera bloomed. For years I kept it in pots which I moved indoors during the winter. A contractor broke a pot and I decided to put the largest plants in the ground. They’ve survived two winters now (although the leaves get some cold damage) and surprised me by flowering.

Meyer lemon
2009-03-15. Citrus x meyeri, Meyer lemon
The lemon tree finally got to big for its pot, too and was looking unhappy. The current pot was almost too big for us to manage bringing it in so I decided to plant it in a protected spot. It began putting out an abundant quantity of new leaves and flowers almost immediately.

Consolida ambigua
2009-03-15. Larkspur, Consolida ambigua

Quite a few flowers (that are blooming this year that weren’t blooming this time last year) overwintered. Typically, many perennials freeze to the ground in Austin but are root hardy. This year these flowers never froze back: asclepias, datura, duranta, ruellia, podranea.

Blooming in 2008 but faded during 2009’s week of 80 degree days: Cercis canadensis, Leucojum aestivum.

Blooming in 2008 but not started blooming yet in 2009: California poppy ‘Mikado’.

Complete List for March

The list of all plants flowering today, March 15th 2009, at Zanthan Gardens. I’ve also noted if the plant was blooming on GBBD March 15th, 2007 or 2008.

  • Aloe barbadensis
  • Asclepias curassavica (overwintered)
  • Bridal wreath spiraea (2008)
  • Citrus x meyeri (2008)
  • Commelinantia anomala (2007, 2008)
  • Consolida ambigua (2007, 2008)
  • Coriander sativum (2007, 2008)
  • Datura (from Diana which overwintered)
  • Duranta erecta (overwintered)
  • henbit (2007, 2008)
  • iris albicans (2007)
  • jalapeno
  • Kalanchoe daigremontiana (Mother of Thousands)
  • Lantana montevidensis (2007, 2008)
  • Lathyrus odoratus ‘Knee-Hi Mix’ (2007)
  • Lavandula heterophylla ‘Goodwin Creek’ (2008)
  • Lobularia maritima (2008)
  • Lupinus texensis (blue, pink, and white) (2007, 2008)
  • Muscari neglectum/racemosum (2007, 2008)
  • Narcissus triandrus ‘Trevithian’ (2007)
  • Nemophila insignis (2008)
  • Oxalis crassipis (hot pink) (2007, 2008)
  • Oxalis pes-caprae ‘Scotty’s Surprise’ (2008)
  • Oxalis triangularis (both purple and white) (2007, 2008)
  • Phlomis lanata
  • Prunus caroliniana (cherry laurel) (2007, 2008)
  • Rhaphiolepis indica (2007, 2008)
  • rose ‘Blush Noisette’ (2008)
  • rose ‘Ducher’ (full bloom) (2007, 2008)
  • rose white Lady Banksia (my neighbor’s but droops over the fence)
  • rose ‘Souvenir de la Malmaison’ (full bloom) (2008)
  • rosemary (very few flowers) (2007, 2008)
  • ruellia (overwintered)
  • Solanum jasminoides (potato vine) (2007,2008)
  • Sophora secundiflora (far fewer flowers than 2008) (2007, 2008)
  • tomatillo
  • tomato ‘Cherokee Purple’
  • Tulip ‘Angelique’
  • Tradescantia (spiderwort) (2007, 2008)
  • Ungnadia speciosa, Mexican buckeye
  • Viola cornuta ‘Sorbet Coconut Duet’ (2007, 2008)
  • Vitia sativa (common vetch, a pretty weed) (2007, 2008)

Personal, not good or bad.

March 14th, 2009
A Matter of Taste

Walking over to Shady Grove for lunch on Tuesday I passed two flower beds.

One I loved…
annual flowers

The other I hated….
annual flowers

The one I loved is a commercial planting, the traffic median at the northwest corner of Lamar and Barton Springs Road. The other is a private home.

As I continued walking, I wondered why this should be so. What’s the difference between these two plantings? They are both exuberant arrangements of colorful winter annuals, planted in a small space, on flat ground. Why did one attract me and the other repel me?

Was it just a form of plant snobbery? I know a lot of people look down their noses at certain plants. These are usually the plants that every suburban non-gardener picks up by the six-pack or flat at the big box store. But I happen to like both snapdragons and pansies (although I prefer their diminuitive cousins the violas). And although there are some flowers that make me instinctively recoil, I learned over the year to avoid absolutes in my garden tastes. If I look with open eyes and an open heart I’m always discovering exceptions to the rule. For example, generally I don’t like orange flowers.

So it must be something that differs about the arrangement of these two plots. I think the commercial planting actually looks more natural and the private garden has that installed look of an office park or strip mall. Maybe that comes from the fact that in the median planting the flowers are not a solid sheet of color (I hate that). There’s a balance of space between the plants which provides a flowing rhythm. The flowers seem more proportional, too; that is, there is a lot of greenery visible. By comparison the arrangement of the snapdragons and pansies seems busy and artificial. For all that it is a “living carpet of color”, it seems stiff and lifeless.

I love flowers. I’m still trying to figure out why one of these works for me and the other doesn’t. What about you?

Pink Bluebonnet
Delicate pink bluebonnet–a natural variation.

March 7th, 2009
Pretty in Pink

Last October I posted about how certain lurid fall pinks made my skin crawl. Those pinks were so intense, so clashing, and completely out of season. In my mind Autumn belongs to the brilliant yellow, orange, and red spectrum.

You might have concluded that I’m the kind of girl who shies away from pink. Although I do gravitate towards black, whites, and grays, I can embrace pink if it’s icy pale and delicate and in its season: Spring.

For example, I never get tired of photographing the gorgeous ‘Souvenir de la Malmaison‘.

rose Souvenir de la Malmaison

And this year, after a 10-year hiatus, I made another attempt to grow ‘Angelique’ tulips. They are struggling in our run of 80-degree days but one flower has opened and I think they’re worth the effort.
tulip Angelique

hole
2009-02-27. The frame is 3’x5′. The hole itself is 2’x4′ and about 20″ deep. Less than 2 feet! If you expected me to dig my own grave before you killed me, we would be here for several years.

March 4th, 2009
Digging Holes for Raspberries

The north boundary of my back yard was one of those areas I used to ignore. A waist-high chain link fence divided me from my neighbors and the previous owners had planted a nandina hedge. I left it because it provided a nice green backdrop with no effort and it blocked the view of my neighbor’s back yard. When someone new moved in he immediately erected a 6-foot tall privacy fence and completely changed my garden.

Now the north bed is protected from cold fronts moving in from the north. The low winter sun shines against the fence all day creating a warm micro-climate. Last year I had a chinaberry and hackberry cut down and planted two roses and made a little herb garden here. This winter I decided to tackle another section.

hole
2009-02-06. The requisite “before” photo.

First I had to remove the nandina. You can cut it to the ground and nandina will come back because it has thick fibrous roots. While I was doing this, I happened across some raspberries at The Great Outdoors. Now raspberries are our favorite fruit. When we visit AJM’s parents in England, I go out every morning and graze at the raspberry patch. But raspberries don’t grow in central Texas. Central Texas is too hot in the winter, too hot in the summer, doesn’t get enough rain, and the soil is limestone clay. Raspberries prefer a sandy, well-drained, slightly acidic soil with plenty of humus.

Are you laughing yet at my folly? Or are also you one of those gardeners who can’t resist a challenge? The nurseryman assured me that these ‘Dorman’ red raspberries could stand our southern heat. If that’s true, then I’d do my part to provide them with the kind the soil they like.

So to digging.
hole
Roots, limestone and flint, and a vein of red clay.

Actually, you can’t really call it digging because that implies putting a shovel into the ground and scooping dirt out. What I did was break up clods of clay with my post hole digger (Vertie, can explain why this is preferable to a pick-ax), and then use my pruners to cut away roots. Repeat. Repeat. Repeat.

This took almost two weeks, working a few hours a day until I collapsed from the back pain. Thank science for ibuprofen. After the first week, I thought the hole was pretty well dug. I put some water in to check the drainage. It didn’t drain. The water sat there for an hour over solid clay. By the next day it had seeped and the clay was softened enough that I was able to dig it out.

hole
I pile a wheelbarrow load of red clay by the driveway.

Job 2: Fill in the hole. It’s a little more than a cubic yard (see photo at top). With some planning I suppose I could have had some garden soil delivered. Maybe next time. I line the hole with weed-blocking cloth. I have poured tons of manure and bought soil into my yard and learned that without weed-blocking cloth the tree roots quickly invade and suck all the life out of the garden soil. If I didn’t use weed-blocking cloth, the hole would revert to the root-infested muck it was before I spent two weeks digging it out.

A neighbor of mine with a goat has given me a wheelbarrow load of goat pellets mixed with straw and juniper needles. I pour that into the bottom of the hole.

Unfortunately, the compost from the compost tumbler is not quite ready yet. But I can turn the open compost pile and sift out the good stuff from the bottom. I use the plastic trays from the nurseries to sift compost.

hole

I mix the homemade compost with free coffee grounds from Starbucks. I also sift the rocks, roots, and clods out of some of the better black soil that came out of the first five or six inches of digging.

hole

As the hole fills in I begin to mix in some premium store-bought compost: Lady Bug Hill Country Garden Soil and Lady Bug Farm Style Compost (cow manure from grass-fed cows). Fancy schmancy, I thought until I compared it with the cheaper cow manure from the big box store. The latter was filled with clay and rocks and did not have the light fluffy texture that the Lady Bug brand has.

I moistened the planting mixture every few inches soil that everything in the hole would be evenly moist (like a damp sponge). Since I did this over several day it also helped it to settle a bit. I place the still-pottedplants where they’re going to go and fill in around them.

hole

AJM built the raised bed from pieces of the failed garden house.

Finally planting takes all of two minutes to pull the pot out of the hole, slip the plant out of the pot, and put it right back in the hole. (They are very young plants and not pot-bound so the roots didn’t need spreading out.)

hole
The “after” picture. I sifted some of the red clay to put around the outside. It almost has the consistency of decomposed granite–which it might be given that I pulled out quite a few red rocks.

The raspberry planting project is not quite finished. AJM is going to build some supports. I still have to add a layer of mulch. I don’t know if raspberries will grow in Austin but I’ve given it my all. If it doesn’t work out, this will be a great bed for potatoes or other root crops.

Project Cost

$29.97: plants: 3 raspberry canes @ $9.99 each
$ 5.99: 1 cubic foot of Lady Bug Hill Country Garden Soil
$ 6.99: 1.5 cubic feet of Lady Bug Farm Style Compost
$ 4.96: 2 pack 4″ mending plates @ 2.48 each (building the raised bed)
_____
$47.91

Note: We already had the lumber and the weed block cloth.